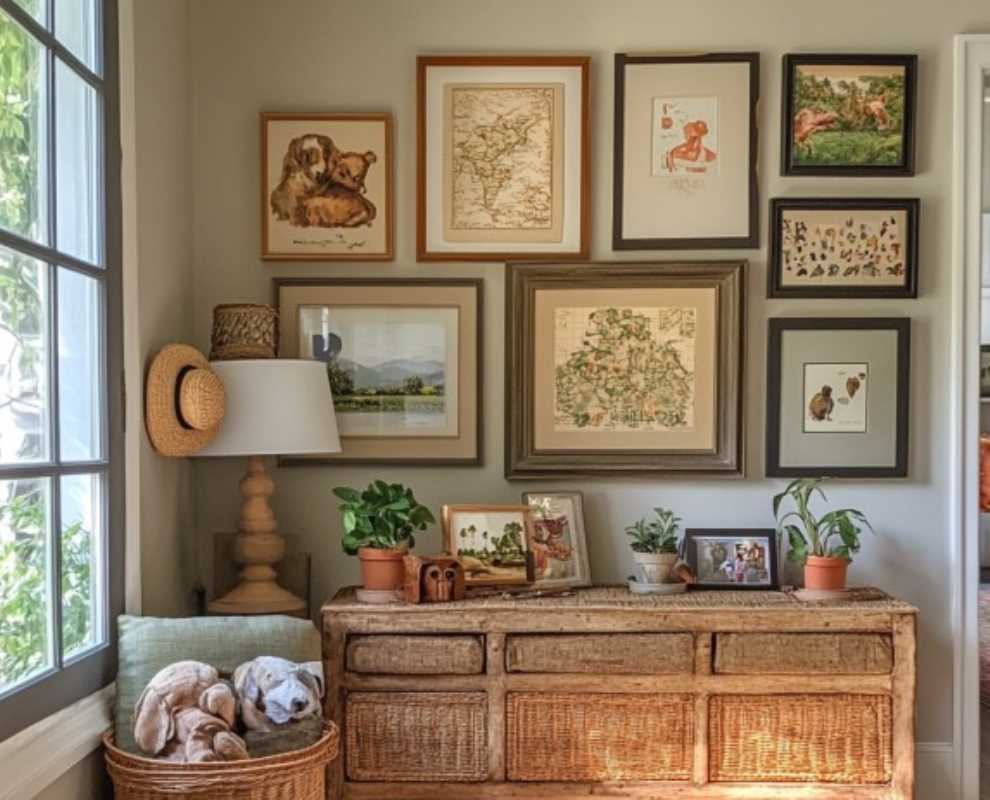
Family art walls bring warmth and personality to your home, turning hallways and living spaces into unique galleries filled with treasured memories. When you display your children’s colorful drawings alongside your partner’s framed photographs and handmade textiles from memorable vacations, you celebrate the creativity and shared history of those you love. Each piece tells its own story, encouraging conversation and inviting everyone—siblings, grandparents, and visitors alike—to pause and appreciate the collection. These art displays offer a lasting tribute to the experiences and talents of your household, making your home feel both welcoming and deeply personal.
Why a Family Art Wall Captivates Everyone
- It combines daily life with visual storytelling by displaying pieces that mark milestones—like that first watercolor of the family pet—turning simple walls into memory vaults.
- It celebrates individual creativity in a shared space, so even the shyest child sees their contribution honored alongside more ambitious projects.
- It creates a rotating exhibit where each season, birthday or holiday prompts a new arrangement or technique, keeping the decor fresh and conversation bubbling.
- It links diverse tastes—modern prints, rustic frames, fabric collages—into one cohesive display, teaching family members how harmony emerges from variety.
- It becomes a hub for communal pride: finishing a joint layout night gives everyone a chance to direct placement, choosing how textures, shapes, and colors interact.
Practical Steps for a Lively Family Art Wall
1. Define Your Display Zone
Purpose: Decide where your gallery will live and how large it can grow.
- Procedure:
- Measure available wall space and mark edges with painter’s tape.
- Lay out paper templates in different shapes to mimic frame sizes.
- Step back and adjust until the grouping feels balanced.
- Cost/Metric: Painter’s tape and kraft paper cost under $15; reusable templates save time on trial-and-error.
- Insider Tip: Reuse cereal boxes for templates—they’re lightweight and durable enough to reposition without tearing.
2. Select a Cohesive Theme
Purpose: Unite varied artwork so each piece feels part of the same story.
- Procedure:
- Choose a color family—like pastels or earth tones—and pick accents that echo those shades across different mediums.
- Collect all candidate pieces onto the floor in rows by hue on a designated day.
- Narrow down extras until you’ve balanced dark, light, and accent tones evenly.
- Availability: Most paint and frame stores offer sample swatches free or under $5.
- Insider Tip: Ask each family member to write a one-sentence “emotion” label for their favorites and use those words to pick matching mats or backgrounds.
3. Mix Frames and Media
Purpose: Create visual interest by contrasting materials.
- Procedure:
- Gather a variety of frames—metal, wood, repurposed finds—and sort into piles by finish (matte vs. glossy).
- Stack photos, collages, 3D objects (like embroidery hoops) in separate groups.
- Pair a sleek metal frame with a homemade collage or a rustic wood frame with a fine-art print.
- Cost: Budget frames start at $3 from thrift stores; custom frames can reach $50+.
- Insider Tip: Collect mismatched frames from flea markets and spray-paint them the same shade for unity without high costs.
4. Arrange for Maximum Impact
Purpose: Guide the eye naturally across your gallery and highlight focal points.
- Procedure:
- Pin numbers on each frame back to establish your intended order.
- Use a laser level or a stretched string to mark a straight guide for aligning tops or centers.
- Hang the heaviest or most colorful piece first at eye level, then fill outward.
- Metric: Hang artwork at about 57–60 inches from floor to center for optimal viewing.
- Insider Tip: Clip clothespins to a taut string anchored at either end of your wall; slide each frame hanger along that string to preview spacing before committing.
5. Rotate and Refresh
Purpose: Keep the exhibit feeling lively rather than static.
- Procedure:
- Set a bi-monthly reminder on everyone’s calendar for a mini “gallery opening.”
- Swap out the smallest or newest pieces first to test new layouts without overhauling the entire display.
- Photograph each version to track favorites for future inspiration.
- Cost: Free if you use existing hardware; extra picture hooks (~$8/pack) help with flexibility.
- Insider Tip: Quietly add one unexpected element—like a pressed leaf collection in a frame—and see family members light up discovering the surprise.
When your collection looks just right, your space becomes a living memoir. From guiding a toddler’s scribbles into a colorful cluster to showcasing mom’s abstract studies, every piece tells a story.
By blending thoughtful planning with playful experimentation, your family art wall will grow alongside you, shifting as tastes and talents change. Invite conversation, celebrate each contribution, and let your walls speak volumes about the creativity you share.